Chrome For Mac Quicktime Plugin
Contents
Chrome wants us to activate the plugin, as if it were not installed. Chrome confirmed the extension was there and was enabled. It leads us to a link on Apple's website which tells us that Apple updates Quicktime plugins automatically through 'Software Update'. It appears our version of Quicktime (Quicktime X) was up-to-date.
- 2. QuickTime Player
QuickTime is readily available for all Apple Mac computers and now comes installed as standard on newer models. However, if you have an older Mac, or if you have previously uninstalled QuickTime from your Mac and now want to install it onto your Mac again please continue reading. Alternatively, if you have QuickTime already and are just looking for a few tips and tricks, or if you just want to find out what version of QuickTime your Mac is running, this article should be of use to you.
QuickTime can be downloaded from Apple directly, or via some of the other trusted free download websites available on the internet. We've set these out for you in a little bit more detail below:
QuickTime: Apple official download
Mac OS X includes QuickTime Player (Version 10.x) which will handle most of your media playback needs. You will only need to install QuickTime if you have an older version of the Mac operating system which does not come with QuickTime already installed, you want to work with older media types, or if you have legacy workflows that are not supported by the newer QuickTime application. You can download QuickTime for Mac here.
QuickTime: Download it from other websites (free)
SOFTONIC: This website also provides ratings for QuickTime, the number of downloads this month and full details of the file size and its pros and cons. (Download)
TUCOWS: This is a great free website where you can download QuickTime quickly and easily for your Mac. This website provides full details of the files that QuickTime can play, together with reviews and details of where you can find product support. (Download)
Steps of QuickTime installation
Step 1. To install QuickTime on a Mac you should download the newest version of QuickTime Download (which at the time of writing is QuickTime Player 7 Version 7.6.6).
Step 2. Once the file has downloaded all you need to do is double click on the file which will be called, QuickTimePlayer7.6.6_SnowLeopard' and QuickTime will be automatically installed in your utilities folder.
How to test QuickTime on Mac
After you have installed QuickTime it is essential to test it to make sure that it has been installed correctly. You should test that QuickTime allows you to playback any steaming video or HD movie contents immediately embedded on a web browser, i.e. Safari. If QuickTime has been installed correctly you will get a message saying, QuickTime has been successfully installed.
Troubleshooting
Sometimes movie files cannot be played by QuickTime without additional software (even though QuickTime can open them). These files typically contain data that was created using a codec, i.e. a compressor that QuickTime player does not support by default. You might be able to obtain software from other developers that allows QuickTime to play these files. However, you should be careful to make sure that these files do not contain any virus or malware that might affect your Mac before you attempt to download them to your computer.
Steps of checking the version of QuickTime on Mac
Step 1. From the Apple menu, choose System Preferences.
Step 2. From the View menu please then choose the option for QuickTime (which should bring up the QuickTime pane).

Step 3. If you click Register you will be able to see the registration information and the edition of QuickTime installed on your Mac will be shown underneath the box for your Registration Code.
Step 4. If you want to go one step further and find out what version of QuickTime update is installed on your Mac you will need to go into the About QuickTime tab. The version of QuickTime your Mac is running will be displayed at the top of the pop up menu.
How to update to the latest version of QuickTime on Mac
From time to time Apple releases newer versions of QuickTime. These can be downloaded (assuming you are connected to the internet). If you are connected to the internet and QuickTime is open, typically you will be notified that a newer version of QuickTime is available by your Mac and you will then be prompted to start the download. However, if you want to check for an update manually, choose: QuickTime Player > Update Existing Software. Your Mac will then check to see if there are any updates pending for QuickTime. If so, all you have to do is follow the on-screen prompts and the newest version will be installed.
If you require help during any stage of this process (and you have QuickTime open) you can see instructions for performing tasks by choosing: Help > QuickTime Player Help. From there you will be able to type in 'update' and QuickTime Help will bring up a full list of instructions in order to guide you through the process.
Create command line launcher for android studio mac. Troubleshooting
If you are having problems installing updates for QuickTime (and reinstalling or repairing it does not work) we would recommend not only to remove QuickTime from your Mac but also any related components, reboot your Mac, remove any target installation folders and then attempt to reinstall QuickTime from the beginning.
A list of the recent updates for QuickTime for the Mac can be found on the Apple website (here). Please note that QuickTime is constantly updated and there might have been further updates since this article was first written.
Steps of checking the version of QuickTime on Mac
If you want to uninstall QuickTime on a Mac you need to find and click the Finder icon in the Dock at the bottom of the screen. You will then need to find the Applications icon which is located in the left hand column of the Finder icon window. Locate the QuickTime icon and drag it into the Trash. Then all you need to do is right click on the Trash and then click on the Empty Trash option to complete the uninstallation process.
If that does not work and you are running QuickTime 5, QuickTime 3, QuickTime 4 or QuickTime 6 then you will need to open the QuickTime installer (if you don't have a copy of the installer then download a new copy). Click agree until you appear that the choose installation type window, and then select the custom option where it will give you the option to uninstall QuickTime. You will receive a command prompt telling you to close down all of your other applications, and you'll need to click continue. This will successfully remove QuickTime from your system, however, it will leave Sound Manager behind. If you want to remove that as well, you can open the extensions folder and remove it to the Trash.
Troubleshooting
If you are having problems uninstalling QuickTime and believe me you can have problems with this depending on your setup and what you do, here's two helpful tips:
1. If all else fails, there's an application you can download (here). When you activate it, it will uninstall QuickTime automatically. This application will remove not only QuickTime but also any associated files, registry entries or extensions that have been created completely from your Mac. A full set of instructions for using Max Uninstaller can be found via the hyperlink at the start of this paragraph.
2. Before you attempt to uninstall QuickTime be sure to back up your registry in case of data loss, or any accidental errors causing problems with your Mac. If the data is correctly backed up you will be able to restore you Mac back into the condition it was in before you tried to remove QuickTime.
Please note that uninstalling QuickTime can be a complex and risky task, particularly if you are attempting manual removal. It involves key parts of your computer system, and it is only recommended for advanced users. If you haven't got any experience in this area it's best to ask someone that has.
Apple released the first version of QuickTime on 2nd December 1991 as a system add-on. It was developed by a man called, Bruce Leak who ran the first public demonstration during May 1991 during the World Developers Conference. It was an outstanding technological breakthrough at the time, particularly as Microsoft didn't release QuickTime's main completing product until November 1992. Since its initial release there have been 8 different versions all offering substantial improvements on previous versions of the software.
Cutting Videos: If you quickly want to reduce the length of a video you can do so very easily in QuickTime by going to the edit menu and selecting 'trim'. The thumbnails will appear at the bottom of the video and all you need to do then is drag the yellow box over the area you want to save.
Combinations: You can quickly combine one or two clips together to make a movie. Open the video that you want to start with, and then find the video that you want to add to it in the Finder and drop it directly into QuickTime. It will appear at the bottom of the window and then you can drag and drop it to wherever you like in the video.
Recordings: If you want to record what you are doing on your Mac all you have to do is open QuickTime and in the menu choose File, and then, capture what you're doing on-screen.
Export Audio Only: If you want to export only the audio you can do so by going to File > Export which will give you the choice over the type of file that you want to export. If you click the drop down box of the export window and choose audio only it will only grab the sound – which is perfect for voiceovers.
Slower Fast Forward: If you hold down the Alt or Option Key as you click the QuickTime fast forward button the speed of the video will be increased at a slower rate which is perfect if you are trying to closely examine the video paying particular attention to detail.
Related Articles
- 1 Quicktime in Firefox Can't See Videos
- 2 Stop Google Chrome Script
- 3 Play a Sony Handycam DVD Mini Disk on a PC
- 4 Use Plugins With Media Player 11
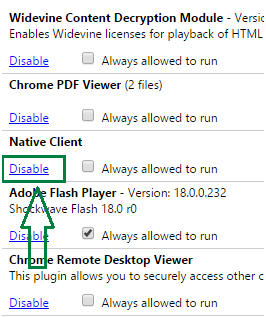
Google Chrome is most famous for its array of simple to install extensions. However, extensions aren't the only add-ons for Chrome. Like other browsers, Chrome supports a range of plug-ins. Browser plug-ins give the program more functionality, such as the ability to play videos or specific audio formats. Not every user needs all the plug-ins available, but a few basic tools can improve your browsing experience.
Adobe Flash Player
Adobe's Flash player comes automatically installed and enabled on Chrome. The browser automatically updates the player. Keeping Flash enabled allows you to play simple games, watch videos, view animated graphics and use some complex websites. Some advertisers use Flash to serve ads. To keep Flash Player enabled but avoid these ads, install a flash blocker extension that lets you selectively turn Flash on one website at a time.
Java
The Java browser plug-in lets Chrome run applets, small programs embedded in a Web page. Java applets enable dynamic Web pages and interactive web programs. Several Web mail programs use Java to work correctly, as do other online utility programs. Chrome does not enable Java automatically. Download this plug-in from the main Java website and install it from the setup file.
PDF Reader
Chrome's built in PDF plug-in lets you view PDF files in your browser window, instead of downloading and opening them separately. This reader, based on the Foxit PDF reader, won't handle some special PDF file features. If you need to view a complex PDF file, download Adobe's Reader plug-in instead. Disable the Chrome PDF Viewer plug-in under the plug-ins menu, then enable the Adobe version. Unlike Chrome's built-in reader, the Adobe plug-in does not update itself.
Windows Media Player
The Windows Media Player plug-in lets you view ASF and ASX files meant for Windows' standalone player. Chrome uses the same plug-in as Firefox. To enable the plug-in, download the appropriate version for your operating system, then run the setup file. The player should install itself. You must restart Chrome to fully enable WMP.
QuickTime
Apple's QuickTime multimedia framework can handle a wide range of video, still image, sound and other formats. You'll need it to play any of Apple's MOV files. Chrome comes with QuickTime automatically bundled, but the plug-in may not be turned on. To enable or disable QuickTime, visit chrome://plugins/ in your Chrome window. This address automatically directs you to the plug-in setting page, where you can change its settings.
References (4)
Resources (3)
About the Author
G.D. Palmer is a freelance writer and illustrator living in Milwaukee, Wis. She has been producing print and Web content for various organizations since 1998 and has been freelancing full-time since 2007. Palmer holds a Bachelor of Arts degree in writing and studio art from Beloit College in Beloit, Wis.
Photo Credits
- Patrik Stollarz/Getty Images News/Getty Images