Create Command Line Launcher For Android Studio Mac
Feb 13, 2011 Does the app need to be run with extra parameters or something? If so, you can write a shell script which simply contains the command you'd type to launch the program, and save it as filename.command and then set the executable bit for the file b.
-->After an application has been coded and tested, it is necessary toprepare a package for distribution. The first task in preparingthis package is to build the application for release, which mainlyentails setting some application attributes.
Use the following steps to build the app for release:
Specify the Application Icon– Each Xamarin.Android application should have an applicationicon specified. Although not technically necessary, some markets,such as Google Play, require it.
Version the Application – This stepinvolves initializing or updating the versioning information. Thisis important for future application updates and to ensure that theusers are aware of which version of the application they haveinstalled.
Shrink the APK – The size of the final APKcan be substantially reduced by using the Xamarin.Android linker onthe managed code and ProGuard on the Java bytecode.
Protect the Application – Prevent usersor attackers from debugging, tampering, or reverse engineering theapplication by disabling debugging, obfuscating the managed code,adding anti-debug and anti-tamper, and using native compilation.
Set Packaging Properties –Packaging properties control the creation of the Androidapplication package (APK). This step optimizes the APK, protectsits assets, and modularizes the packaging as needed.
Compile – This step compiles the code andassets to verify that it builds in Release mode.
Archive for Publishing – This step builds theapp and places it in an archive for signing and publishing.
Each of these steps is described below in more detail.
Specify the Application Icon
It is strongly recommended that each Xamarin.Android applicationspecify an application icon. Some application marketplaces will notallow an Android application to be published without one. The Iconproperty of the Application attribute is used to specify theapplication icon for a Xamarin.Android project.
In Visual Studio 2017 and later, specify the application icon throughthe Android Manifest section of project Properties, as shown inthe following screenshot:
In Visual Studio for Mac, it is also possible to specify theapplication icon through the Android Application section ofProject Options, as shown in the following screenshot:
In these examples, @drawable/icon refers to an icon file that islocated at Resources/drawable/icon.png (note that the .pngextension is not included in the resource name). This attributecan also be declared in the file PropertiesAssemblyInfo.cs, asshown in this sample snippet:
Normally, using Android.App is declared at the top ofAssemblyInfo.cs (the namespace of the Application attribute isAndroid.App); however, you may need to add this using statement ifit is not already present.
Version the Application
Versioning is important for Android application maintenance anddistribution. Without some sort of versioning in place, it is difficultto determine if or how an application should be updated. To assist withversioning, Android recognizes two different types of information:
Version Number – An integer value (used internally byAndroid and the application) that represents the version of theapplication. Most applications start out with this value set to 1,and then it is incremented with each build. This value has norelationship or affinity with the version name attribute(see below). Applications and publishing services should notdisplay this value to users. This value is stored in theAndroidManifest.xml file as
android:versionCode.Version Name – A string that is used only forcommunicating information to the user about the version of theapplication (as installed on a specific device). The version nameis intended to be displayed to users or in Google Play. This stringis not used internally by Android. The version name can be anystring value that would help a user identify the build that isinstalled on their device. This value is stored in theAndroidManifest.xml file as
android:versionName.
In Visual Studio, these values can be set in the Android Manifestsection of project Properties, as shown in the followingscreenshot:
These values can be set via the Build > Android Application sectionof Project Options as shown in the following screenshot:
Shrink the APK
Xamarin.Android APKs can be made smaller through a combination of theXamarin.Android linker, which removes unnecessary managed code, andthe ProGuard tool from the Android SDK, which removes unused Javabytecode. The build process first uses the Xamarin.Android linker tooptimize the app at the managed code (C#) level, and then it later usesProGuard (if enabled) to optimize the APK at the Java bytecode level.
Configure the Linker
Release mode turns off the shared runtime and turns on linking so thatthe application only ships the pieces of Xamarin.Android required atruntime. The linker in Xamarin.Android uses static analysis todetermine which assemblies, types, and type members are used orreferenced by a Xamarin.Android application. The linker then discardsall the unused assemblies, types, and members that are not used (orreferenced). This can result in a significant reduction in the packagesize. For example, consider theHelloWorld sample, whichexperiences an 83% reduction in the final size of its APK:
Configuration: None – Xamarin.Android 4.2.5 Size = 17.4 MB.
Configuration: SDK Assemblies Only – Xamarin.Android 4.2.5 Size = 3.0 MB.
Set linker options through the Android Options section of the projectProperties:
SSDs with native TRIM support: Angelbird 1TB, 512GB & 256GB wrkWe’ve just recieved and tested our first shipment of Angelbird SSD wrk for Mac drives, so I guess it’s about time to let you know we’re happy to now be an official Angelbird UK re-seller.Angelbird SSDs are unique in the fact that they feature native TRIM support for Mac systems. Angel bird 512gb ssd wrk for mac free. They make great scratch disks too.SSD wrk PerformanceWe are now stocking Angelbird SSD wrk 1TB, 512GB & 256GB drives which will be installed in our custom Mac Pro 5,1 systems as well as sold separately when required. This is especially handy as the previous workaround (TRIM enabler) has it’s fair share of issues, especially in OS X 10.10 (Yosemite).TRIM is useful because it allows SSDs to function at their top speeds regardless of how much data is stored on the drive, in contrast to HDDs which will slow as more data is added. These drives are perfect for storing your OS, applications and working data.
The Linking pull-down menu provides the following options forcontrolling the linker:
None – This turns off the linker; no linking will beperformed.
SDK Assemblies Only – This will only link the assembliesthat are required by Xamarin.Android.Other assemblies will not be linked.
Sdk and User Assemblies – This will link all assembliesthat are required by the application, and not just the onesrequired by Xamarin.Android.
Set linker options through the Linker tab in the Android Buildsection of Project Options, as shown in the following screenshot:
The options for controlling the linker are as follows:
Don't link – This turns off the linker; no linking willbe performed.
Link SDK assemblies only – This will only link theassemblies that arerequired byXamarin.Android. Otherassemblies will not be linked.
Link all assemblies – This will link all assemblies thatare required by the application, and not just the ones required byXamarin.Android.
Linking can produce some unintended side effects, so it is importantthat an application be re-tested in Release mode on a physical device.
ProGuard
ProGuard is an Android SDK tool that links and obfuscates Java code.ProGuard is normally used to create smaller applications by reducingthe footprint of large included libraries (such as Google PlayServices) in your APK. ProGuard removes unused Java bytecode, whichmakes the resulting app smaller. For example, using ProGuard on smallXamarin.Android apps usually achieves about a 24% reduction in size– using ProGuard on larger apps with multiple librarydependencies typically achieves an even greater size reduction.
ProGuard is not an alternative to the Xamarin.Android linker. TheXamarin.Android linker links managed code, while ProGuard links Javabytecode. The build process first uses the Xamarin.Android linker tooptimize the managed (C#) code in the app, and then it later usesProGuard (if enabled) to optimize the APK at the Java bytecode level.
When Enable ProGuard is checked, Xamarin.Android runs the ProGuardtool on the resulting APK. A ProGuard configuration file is generatedand used by ProGuard at build time. Xamarin.Android also supportscustom ProguardConfiguration build actions. You can add a customProGuard configuration file to your project, right-click it, and selectit as a build action as shown in this example:
ProGuard is disabled by default. The Enable ProGuard option isavailable only when the project is set to Release mode. AllProGuard build actions are ignored unless Enable ProGuard ischecked. The Xamarin.Android ProGuard configuration does not obfuscatethe APK, and it is not possible to enable obfuscation, even with customconfiguration files. If you wish to use obfuscation, please seeApplication Protection with Dotfuscator.
For more detailed information about using the ProGuard tool, seeProGuard.
Protect the Application
Disable Debugging
During development of an Android application, debugging is performedwith the use of the Java Debug Wire Protocol (JDWP). This is atechnology that allows tools such as adb to communicate with a JVM forthe purposes of debugging. JDWP is turned on by default for Debugbuilds of a Xamarin.Android application. While JDWP is important duringdevelopment, it can pose a security issue for released applications.
Important
Always disable the debug state in a released application as itis possible (via JDWP) to gain full access to the Java process andexecute arbitrary code in the context of the application if this debugstate is not disabled.
The Android Manifest contains the android:debuggable attribute, whichcontrols whether or not the application may be debugged. It isconsidered a good practice to set the android:debuggable attribute tofalse. The simplest way to do this is by adding a conditional compilestatement in AssemblyInfo.cs:
Note that Debug builds automatically set some permissions to make debugeasier (such as Internet andReadExternalStorage). Release builds, however, use onlythe permissions that you explicitly configure. If you find thatswitching to the Release build causes your app to lose a permissionthat was available in the Debug build, verify that you have explicitlyenabled this permission in the Required permissionslist as described inPermissions.
Application Protection with Dotfuscator
Even with debugging disabled, it is still possible forattackers to re-package an application, adding or removingconfiguration options or permissions. This allows them toreverse-engineer, debug, or tamper with the application.Dotfuscator CommunityEdition (CE) canbe used to obfuscate managed code and inject runtime security statedetection code into a Xamarin.Android app at build time to detectand respond if the app is running on a rooted device.
Dotfuscator CE is included with Visual Studio 2017.To use Dotfuscator, click Tools > PreEmptive Protection - Dotfuscator.
To configure Dotfuscator CE, please seeUsing Dotfuscator Community Edition with Xamarin.Once it is configured, Dotfuscator CE will automatically protect eachbuild that is created.
Even with debugging disabled, it is still possible forattackers to re-package an application, adding or removingconfiguration options or permissions. This allows them toreverse-engineer, debug, or tamper with the application.Although it does not support Visual Studio for Mac, you can useDotfuscator Community Edition (CE)with Visual Studio to obfuscate managed code and inject runtime security statedetection code into a Xamarin.Android app at build time to detectand respond if the app is running on a rooted device.
To configure Dotfuscator CE, please seeUsing Dotfuscator Community Edition with Xamarin.Once it is configured, Dotfuscator CE will automatically protect eachbuild that is created.
Bundle Assemblies into Native Code
When this option is enabled, assemblies are bundled into a nativeshared library. This option keeps the code safe; it protects managedassemblies by embedding them in native binaries.
This option requires an Enterprise license and is only available whenUse Fast Deployment is disabled. Bundle assemblies into nativecode is disabled by default.
Note that the Bundle into Native Code option does not mean thatthe assemblies are compiled into native code. It is not possible to useAOT Compilation to compile assemblies into native code(currently only an experimental feature, and not for production use).
AOT Compilation
The AOT Compilation option (on thePackaging Properties page) enablesAhead-of-Time (AOT) compilation of assemblies. When this option isenabled, Just In Time (JIT) startup overhead is minimized byprecompiling assemblies before runtime. The resulting native code isincluded in the APK along with the uncompiled assemblies. This resultsin shorter application startup time, but at the expense of slightlylarger APK sizes.
The AOT Compilation option requires an Enterprise license orhigher. AOT compilation is available only when the project isconfigured for Release mode, and it is disabled by default. For moreinformation about AOT Compilation, seeAOT.
LLVM Optimizing Compiler
The LLVM Optimizing Compiler will create smaller and faster compiledcode and convert AOT-compiled assemblies into native code, but at theexpense of slower build times. The LLVM compiler is disabled bydefault. To use the LLVM compiler, the AOT Compilation option mustfirst be enabled (on thePackaging Properties page).
Note
The LLVM Optimizing Compiler option requires an Enterprise license.
Set Packaging Properties
Packaging properties can be set in the Android Options section ofproject Properties, as shown in the following screenshot:
Packaging properties can be set in the Project Options, as shown inthe following screenshot:
Many of these properties, such as Use Shared Runtime, and UseFast Deployment are intended for Debug mode. However, when theapplication is configured for Release mode, there are other settingsthat determine how the app isoptimized for size and execution speed,how it is protected from tampering, and how it can bepackaged to support different architectures and size restrictions.
Specify Supported Architectures
When preparing a Xamarin.Android app for release, it is necessary tospecify the CPU architectures that are supported. A single APK cancontain machine code to support multiple, different architectures. SeeCPU Architecturesfor details about supporting multiple CPU architectures.
Generate One Package (.APK) per Selected ABI
When this option is enabled, one APK will be created for each of thesupported ABI's (selected on the Advanced tab, as described inCPU Architectures)rather than a single, large APK for all supported ABI's. This option isavailable only when the project is configured for Release mode, and itis disabled by default.
Multi-Dex
When the Enable Multi-Dex option is enabled, Android SDK tools areused to bypass the 65K method limit of the .dex file format. The65K method limitation is based on the number of Java methods that anapp references (including those in any libraries that the app dependson) – it is not based on the number of methods that are writtenin the source code. If an application only defines a few methods butuses many (or large libraries), it is possible that the 65K limit willbe exceeded.
It is possible that an app is not using every method in every librarythat is referenced; therefore, it is possible that a tool such asProGuard (see above) can remove the unused methods from code. The bestpractice is to enable Enable Multi-Dex only if absolutelynecessary, i.e.the app still references more than 65K Java methods evenafter using ProGuard.
For more information about Multi-Dex, seeConfigure Apps with Over 64K Methods.
Compile
After all of the above steps are completed, the app is ready forcompilation. Select Build > Rebuild Solution to verify that itbuilds successfully in Release mode. Note that this step does not yetproduce an APK.
Signing the App Package discusses packaging and signing in more detail.
After all of the above steps are completed, compile the application(select Build > Build All) to verify that it builds successfullyin Release mode. Note that this step does not yet produce an APK.
Archive for Publishing
To begin the publishing process, right-click the project in SolutionExplorer and select the Archive.. context menu item:
Archive.. launches the Archive Manager and begins the processof archiving the App bundle as shown in this screenshot:
Another way to create an archive is to right-click the Solution in theSolution Explorer and select Archive All.., which builds thesolution and archives all Xamarin projects that can generate anarchive:
Both Archive and Archive All automatically launch the ArchiveManager. To launch the Archive Manager directly, click theTools > Archive Manager.. menu item:
The solution's archives at any time by right clicking the Solutionnode and selecting View Archives:
The Archive Manager
The Archive Manager is comprised of a Solution List pane, anArchives List, and a Details Panel:
The Solution List displays all solutions having at least onearchived project. The Solution List includes the followingsections:
- Current Solution – Displays the current solution. Note that this area may be empty if the current solution does not have an existing archive.
- All Archives – Displays all solutions that have an archive.
- Search text box (at the top) – Filters the solutions listed in the All Archives list according to the search string entered in the text box.
The Archives List displays the list of all archives for theselected solution. The Archives List includes the followingsections:
- Selected solution name – Displays the name of the solution selected in the Solution List. All information shown in the Archives List refers to this selected solution.
- Platforms Filter – This field makes it possible to filter archives by platform type (such as iOS or Android).
- Archive Items – List of archives for the selected solution. Each item in this list includes the project name, creation date, and platform. It can also show additional information such as the progress when an item is being archived or published.
The Details Panel displays additional information about eacharchive. It also allows the user to start the Distribution workflow oropen the folder where the distribution has been created. The BuildComments section makes it possible to include build comments in thearchive.
Distribution
When an archived version of the application is ready to publish, selectthe archive in the Archive Manager and click the Distribute..button:
The Distribution Channel dialog shows information about the app, anindication of distribution workflow progress, and a choice ofdistribution channels. On the first run, two choices are presented:
It is possible to choose one of the following distribution channels:
Ad-Hoc – Saves a signed APK to disk that can be sideloaded to Android devices. Continue to Signing the App Package to learn how to create an Android signing identity, create a new signing certificate for Android applications, and publish an ad hoc version of the app to disk. This is a good way to create an APK for testing.
Google Play – Publishes a signed APK to Google Play. Continue to Publishing to Google Play to learn how to sign and publish an APK in the Google Play store.
To begin the publishing process, select Build > Archive for Publishing:
Archive for Publishing builds the project and bundles it into anarchive file. The Archive All menu choice archives all archivableprojects in the solution. Both options automatically open the ArchiveManager when the build and bundling operations complete:
In this example, the Archive Manager lists only one archivedapplication, MyApp. Notice that the comment field allows a shortcomment to be saved with the archive. To publish an archived version ofa Xamarin.Android application, select the app in the ArchiveManager and click Sign and Distribute.. as shown above. Theresulting Sign and Distribute dialog presents two choices:
From here, it is possible to select the distribution channel:
Ad-Hoc – Saves a signed APK to disk so it can besideloaded to Android devices. Continue toSigning the AppPackageto learn how to create an Android signing identity, create a newsigning certificate for Android applications, and publish an“ad hoc” version of the app to disk. This is a good wayto create an APK for testing.
Google Play – Publishes a signed APK to Google Play.Continue toPublishing to Google Playto learn how to sign and publish an APK in the Google Play store.

Related Links
Apart from using real Android devices, a viable option is to download, install and use an Android emulator.In NativeScript, we can use all Android emulators that are connected and recognized by the tns device command. More information about this command could be found in the tns device article.
Example output from tns device
Tip: Sometimes emulators take longer to start. As a recommendation and to avoid timing issues, start the emulator before executing other CLI commands.Once the emulator is started, leave it open to avoid the initial load time the next time you need to deploy an Android application.
Creating Android Virtual Device via Android Studio
Follow the official documentation on Creating and Managing Virtual Devices, where the process of downloading, setting up, and using Android Emulators via Android studio is covered.
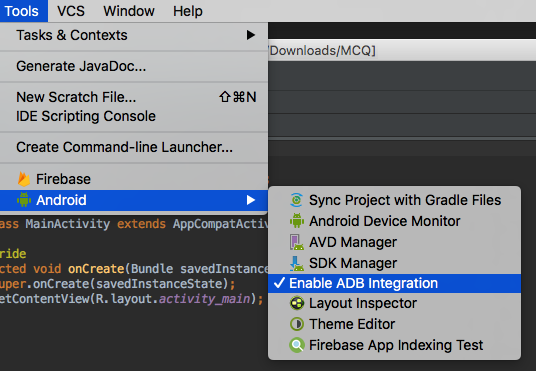
Note: If your top-level 'Tools' menu does not include the 'Android' option (a common issue in versions >3.0.0), follow the instructions in this StackOverflow answer to add this to the toolbar and enable the AVD Manager.
Creating Android Virtual Device via command line tool
The avdmanager is a tool that allows you to create and manage Android Virtual Devices (AVDs) from the command line. The avdmanager is provided in the Android SDK Tools package (25.3.0 and higher) and is located in <ANDROID_HOME_PATH_HERE>/tools/bin/. For more information about the avdmanager and how to use it to create AVDs, see the official avdmanager documentation.
Command syntax to create new AVD
You must provide a name for the AVD and specify the ID of the SDK package to use for the AVD using sdk_id wrapped in quotes. For example, the following command creates an AVD named test using the x86 system image for API level 25:
Note: The above command suggest that the system image is already downloaded. To download an image use the sdkmanager. For example sdkmanager 'system-images;android-25;google_apis;x86'
The following describes the usages for the other options:-c {path size}: The path to the SD card image for this AVD or the size of a new SD card image to create for this AVD, in KB or MB, denoted with K or M. For example, -c path/to/sdcard/ or -c 1000M.-f: Force creation of the AVD. Use this option if you need to overwrite an existing AVD with a new AVD using the same name.-p path: Path to the location where the directory for this AVD's files will be created. If you do not specify a path, the AVD will be created in ~/.android/avd/.
To list all the downloaded system images use the list command.
Using third-party emulators
An applicable option is to use third-party emulators (like GenyMotion).Visit the official sites for details on how to install and use these emulators.